Index and Pins --- Skewers --- Double attacks --- Knight forks
Discovered attacks --- Deflection --- Back rank mates
Skewers: destroying the shield of a piece
Skewers are in a way the opposite of pins; you attack a piece and when it steps aside, you can take a lesser piece that was sheltering behind it. In some countries, skewers are known as x-ray attacks.
The basic idea
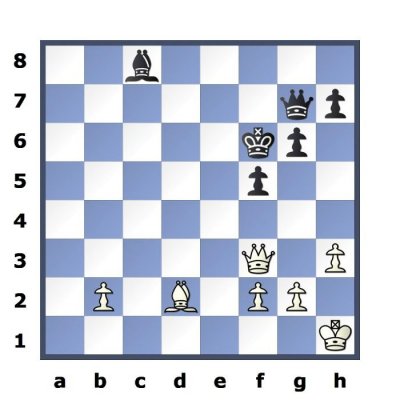
This is similar to the first example we gave of pins. But the difference here is that the Black King is in front of the Queen (not behind her) and can be forced aside so as to expose the Black Queen.
White plays his Bishop to c3. The check forces the Black King to move aside, and the Queen can be captured.
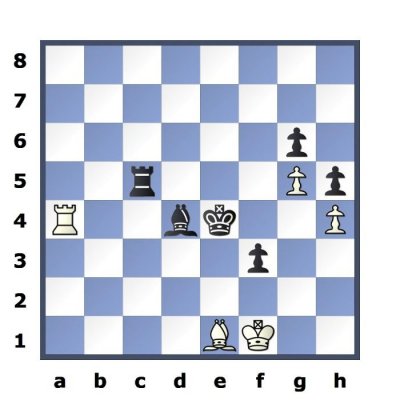
Bringing about a skewer
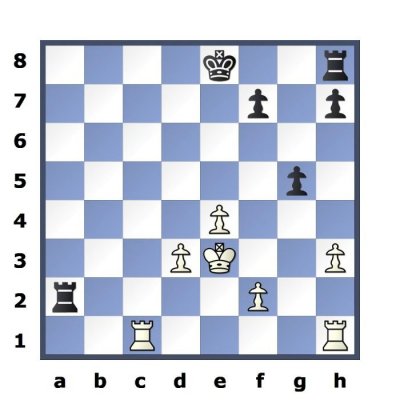
White is under some pressure here, on account of Black's advanced f-pawn. But he can turn the tables by bringing about the position in diagram 2.
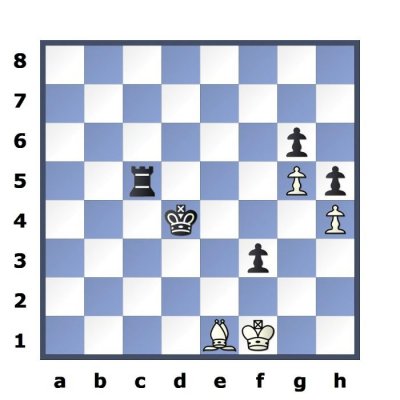
The way to do this (from Diagram 1) is to take Black's Bishop on d4. The King must recapture (diagram 2), and White then skewers Black's King and Rook with Bf2+, and the White King can pick up the f-pawn two moves later.
Skewering with the Rook
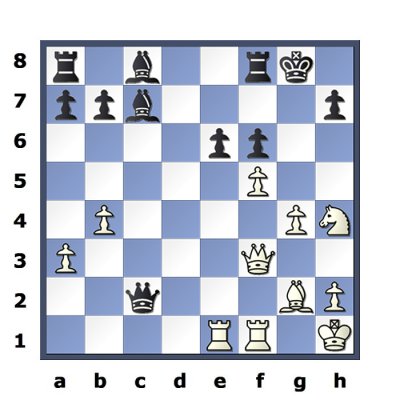
Up until now, we have only seen examples where a Bishop has done the skewering; but Queens and Rooks can also delivers skewers...
An all too common theme is illustrated here. The Black Queen has snatched the White Pawn on c2, and White can now effect a skewer by moving the Rook from e1 to c1. The Black Queen must move, and the Rook can capture the now undefended Bishop on c7.
Watch your back rank
Here is another common disaster. You must always keep an eye on your back rank (i.e. back row) to guard against snap attacks that win the game.
Black's Rook has wandered down to a2 without considering the threat to his back rank. White can now take his Rook from c1 to c8, skewering the King. The King must move, and the Rook on h8 is lost.
Rook & Pawn versus Rook
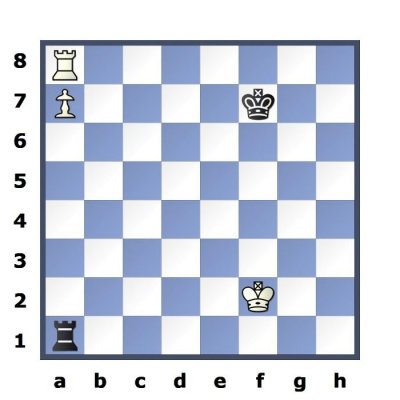
White has an extra pawn, but how is he to get it through to promotion on the 8th rank? If he moves his Rook then the Black Rook will simply capture it, and marching the White King up to relieve the Rook doesn't work either, as the King can be harassed for ever by the Black Rook.
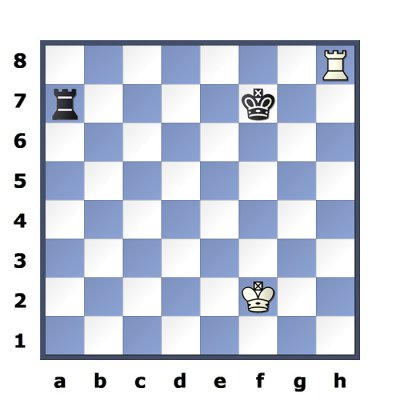
But White has a trick up his sleeve: he plays the Rook to h8, and when Black captures the rook (diagram 2) White plays his Rook to h7, skewering the King and winning the Black Rook.
In the first diagram Black should have kept his King on g7, when the position would have been a draw.
Index and Pins --- Skewers --- Double attacks --- Knight forks --- Discovered attacks --- Deflection --- Back rank mates