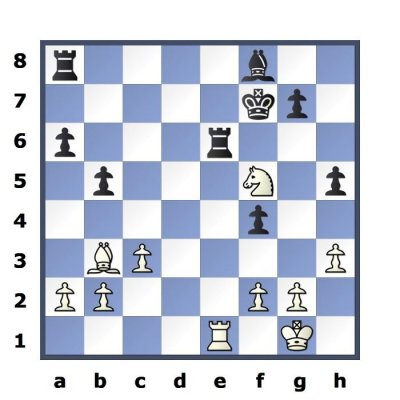
Tactical motifs in chess: how to win material
There are all sorts of ways to get the advantage in a game of chess, and these often fall into one of a few general ideas that are used over and over in chess games. Knowing these ideas / patterns is quite important, so here are half a dozen of the main ones:
- Pins: paralysing your opponent's pieces
- Skewers: the x-ray attacks
- Double attacks: hitting your opponent from two directions
- Knight forks: a special double attack
- Discovered attacks: ambushing your opponent
- Deflection
- Back rank mates: take great care of your back rank
Pins: paralysing your opponent's pieces
Pins come about when you attack a piece which is shielding a more important piece.
The basic idea
In this basic example (diagram 1) White has noticed that Black's King and Queen are in a line.
White has therefore moved his Bishop to c3, attacking the Black Queen. But the Queen can't move out of the line of fire as this would put her own King in check. The Queen is pinned and will be captured next move.
A pin paralyses a piece, with the result that it cannot sensibly escape the attack.
The basic idea (2)
Here is another example, similar to the previous one. Black has carelessly allowed his King and his Rook to be in line diagonally, and so the White Bishop can move to the square b2, pinning the Rook.
The Rook will be captured on White's next move, leaving an easy win for White.
Reinforcing the pin
With the Rook unable to move, you might think that capturing it would be the best move. Not so, for after the Bishop takes the Rook and the Black King takes the Bishop, White is left a pawn up - which in this position cannot be forced through to promotion to a Queen.
The Rook isn't going anywhere, and White has time to attack it again by moving the pawn to e3. This gives White a Rook for nothing, and easy victory.
(Almost) total paralysis
This is an especially deadly example, variations of which arise once in a while. Black can never break the pin on his Knight, as there is simply no way to do it; his position is dead lost.
In a few moves, Black will have to leave his Knight to be captured, and that will be game over.
The pin on f2 (or f7)

Bishops are often developed where they pin the f-pawns in front of a castled position; take note of the Black Bishop on b6, which is pinning White's pawn on f2.
Black to move can simply gobble up the Knight on g3, as his own Knight cannot be recaptured by the pinned f-pawn.
This is a common theme, which you should always be aware of.
Danger: pieces in line
Black has made the disastrous decision to place his Queen on the same diagonal as his King. White moves his King's Bishop to b5... and the Queen is lost!
A more complex idea
White checked his opponent by planting his Knight on e6 (Ne6+). What can Black do? He cannot take the Knight with his Queen,as it is now pinned by the White Queen on b2.
Nor can Black move his King out of harm's way, as White would capture the now undefended Black Queen with his own Queen.The only hope would appear to be capturing the White Knight with the f-pawn (fxe6), as in diagram 2 - but that allows the White Rook to invade with Rc7+, forcing the Black King away from the defence of his Queen. The Black Queen is lost.
A mating attack
The pin on the Knight on f6 allows White to check Black's King quite safely; the Black Knight cannot move at all, let alone capture the Black Queen.
If the Black King goes to h6, then Qg5 is mate immediately.
The only square left is h8, but White again exploits the paralysed Knight by playing Qe4 (diagram 2) and mate on h7 cannot be avoided.
The Knight is lost
Note the Bishop lurking at a1, and pinning the Black Knight.
White has moved his Queen to g5, attacking both the enemy Queen and the Knight. This forces Black to capture the White Queen, allowing the f-pawn to capture back, and winning the pinned Knight.
Detroying the defences
At first glance, Black's position seems fairly well-defended. But with the stunning move Rxf7, White shows that to be an illusion. The Black King takes the Rook, but then the White Knight steps in and takes the Bishop (diagram 2), uncovering a further attack from the Rook on e1. The Black Rook is pinned, and is lost.
Note that defending the Rook by bringing the other Black Rook to e8 is no help at all; White can then move his Knight to d4, which adds a third attacker to the situation. The pressure on the e6 Rook is irressistible.
Pins in everyday positions
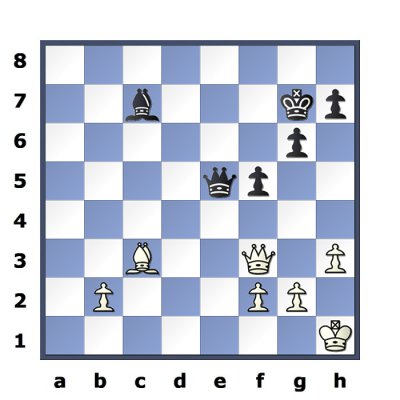
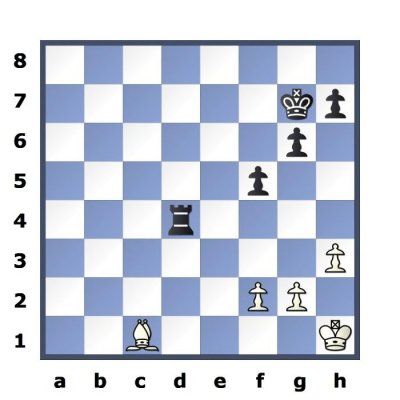
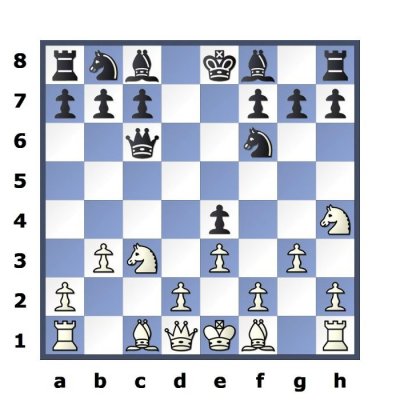
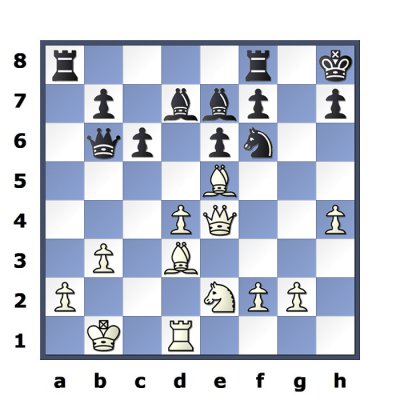
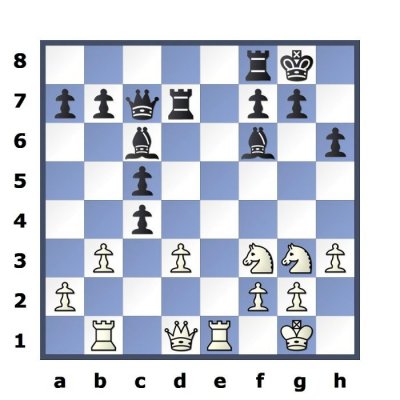
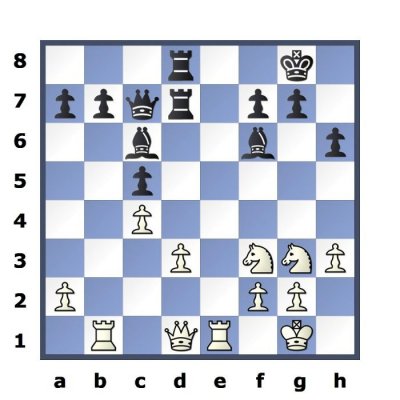
You should not get the idea that pins only arise as spectacular winning devices; in fact, pins occur frequently in every game and are usually not immediately winning moves, but simply moves that make your opponent's position that bit less comfortable. Here's one from the Selkirk Championship.
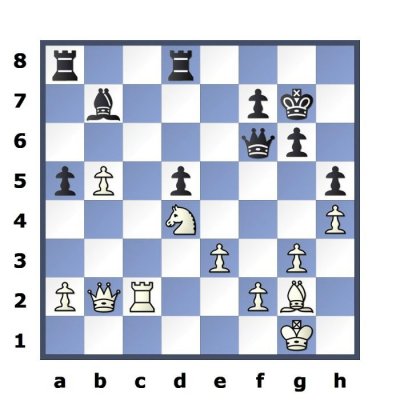
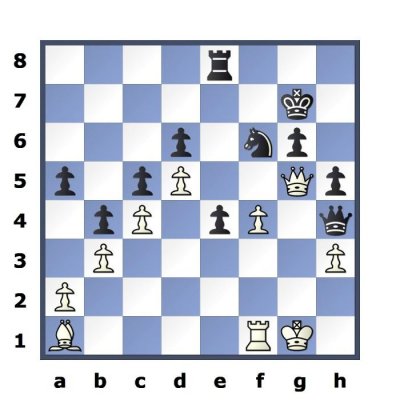
I was playing Black, and in the first diagram I have captured White's pawn on c4. White can't capture back with his d-pawn as that is pinned by my Rook, and the White Queen would be gone. So White has to recapture with his b-pawn (diagram 2); all very well - but that leaves White with a weak pawn on d3 which is not easily defended. I piled up on that pawn. It fell - and I gained the advantage in the game. It was the pin that forced White to allow the creation of a weak pawn on d3.
Index and Pins --- Skewers --- Double attacks --- Knight forks --- Discovered attacks --- Deflection --- Back rank mates